First, the health thing, I noticed this annoying little lump at the bottom of my right foot; tons of testing and doctors later, turns out I have "Plantar Fibromatosis". Which are just painful little tumors but are never cancer. When it hurts enough, they will operate and remove them. Until then, I'm not keen on anyone cutting up the bottom of my feet.... So onto our sewing project:
Now before we were rudely interrupted, we were making a happy little scrub top. We had left off after getting all the pieces of the pattern cut so you should have something that looks like this:

To start on top "B", the directions say to make the pockets like we would if we were making top "A"


Sorry if the striped ironing board is distracting.... never really paid attention to it until now!! Ok, so the directions say something about folding 1/4 of a inch something fold line something something.... That is exactly what it says!!!
Now I have a handy little tool, it is a 6 inch measuring thing with a blue slide on it which makes it super easy to find 1/4 or 1/2 or whatever the pattern calls for.


What the directions want you to do, and it actually says it in a round about way is fold 1/4 inch of the raw edge from the top of the pocket that will eventually tuck up under the fold line that is on the pattern to make the finished edge of the pocket. Now that sounds simple enough! So here are some photos going through those steps:

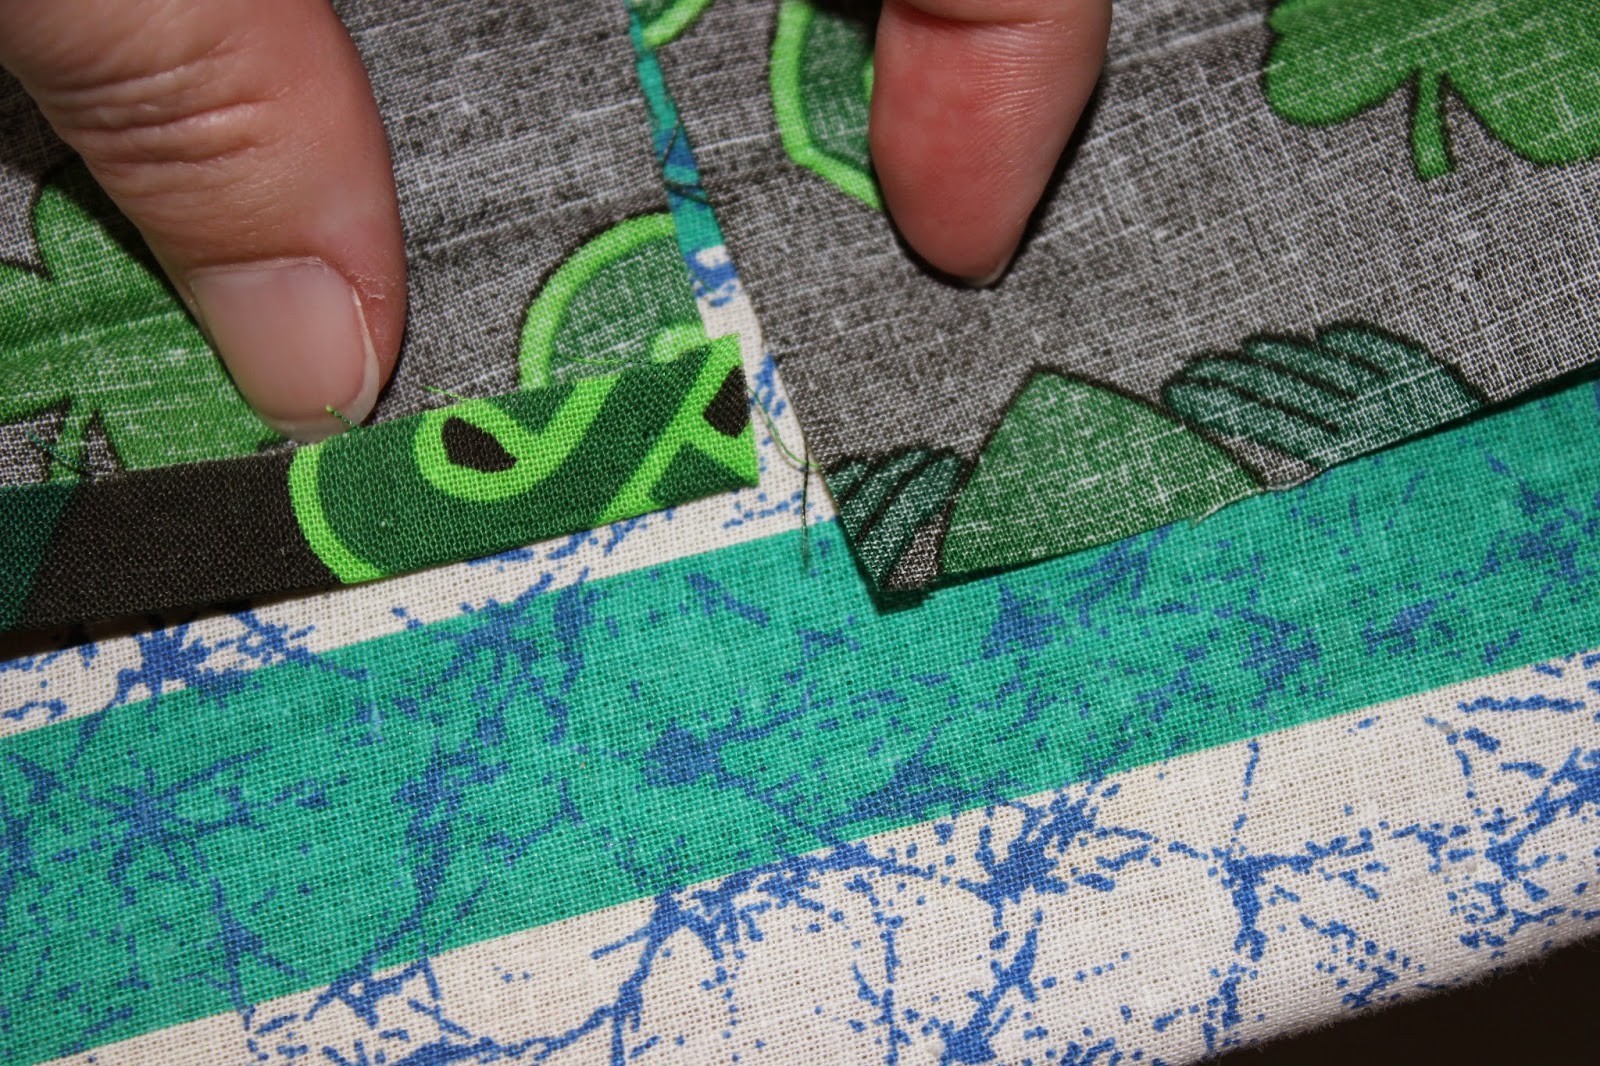

Once you have the fold tucked under, then proceed to the next step which is basically repeat the 1/4 inch fold around the perimeter of the pocket:


We all know how to thread a machine and everything and we are ready to sew, right? If not, please comment and I will address the threading of the machine. It is usually pretty simple and the manufacturer will have a schematic printed on the machine itself, but give me a holler if you need help.
I chose black thread for this project because I have a ton of it and I thought it would be less noticeable once the garment is finished. However it isn't the easiest to see in some of the pictures so I apologize for that. I should have used yellow thread!!!
So we want to stitch the perimeter of the pocket on the machine taking care to "picture frame" it or not run off the edges (makes a stronger seam) so here is a tip when turning corners,


Leave the needle in the fabric when you lift up on the presser foot. This will cause a pivot type action and your stitch will pick up just around the corner. Many of the newer machines will have a button to lower the needle and if you have an older machine. simply turn the wheel thing until the needle is in the fabric!
Questions so far? Please comment if you do, I'll get back to you!
So repeat procedure for two remaining pockets until you have three (2 larger, one smaller) complete pockets and they are ready to be placed on the front of the scrub top! Remember once the pockets are sewn, turn back to view "B" so we don't make a boo-boo and sew too much into the "A" directions, only to realize we need to rip out a bunch of stitching, which is not THAT big of a deal, but a time waster. So pockets are finished, let's flip back to view "B" and see what to do with these pockets.

Another tool I use is a chalk pencil, the markings aren't that bright or noticeable, so feel free to use whatever means to transfer all those dots and circles from the pattern to the wrong side of the fabric so you can line up things.

So line up the pockets with the dots that you marked on the fabric and it should look something like this:


Ok, pockets pinned in place, happy with placement? Good, let's stitch them onto the top, the directions say to stitch as close as you can to the stitching that is already there from when we first made the pockets. This is really difficult to see with the black thread, so try your best to either have an even space all the way around or stitch over the top of the other line.
Now the other thing the pattern doesn't tell you: but I do this, because I wear these tops and use/abuse the pockets; once you get to the top of the pocket where it attaches to the top, stitch back and forth there a few times so the threads don't loosen over time. Easiest way to do this is using the backwards or reverse button on your machine. If feeling adventurous, you can "Bar tack" them on which means using a very dense zig-zag stitch that basically stays in the same spot. If you look at most jeans, the areas with the thick thread near the zipper is bar-tacked.

Well, my dear readers, I really think that is enough for one day. You should have at this point, pockets attached to the front of your top. Next time we will make the neck and back facing, stitch the front to the back and finish off the sleeves and bottom hem. After that, we will have a top!!!
No comments:
Post a Comment